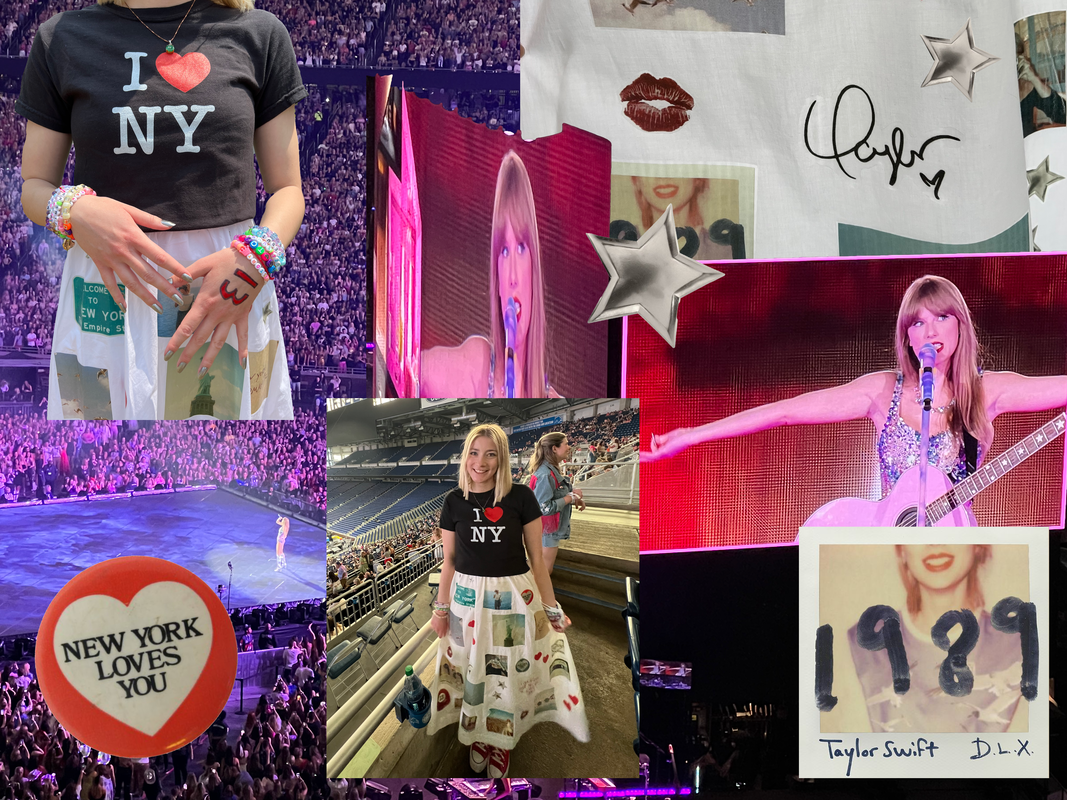
 On Friday, June 9th, I attended Detroit Night 1 of Taylor Swift’s highly-anticipated Eras Tour. Let me tell you, the show was even more spectacular than I could have imagined. With a 44 song setlist, we got a taste of Taylor’s various albums and eras. My favorite Taylor Swift album is 1989. It is an album I can genuinely call a “no skips” album. Naturally, I wanted to create a 1989 inspired look for the concert. This blog post details how I created my unique 1989-themed outfit for the Eras Tour. 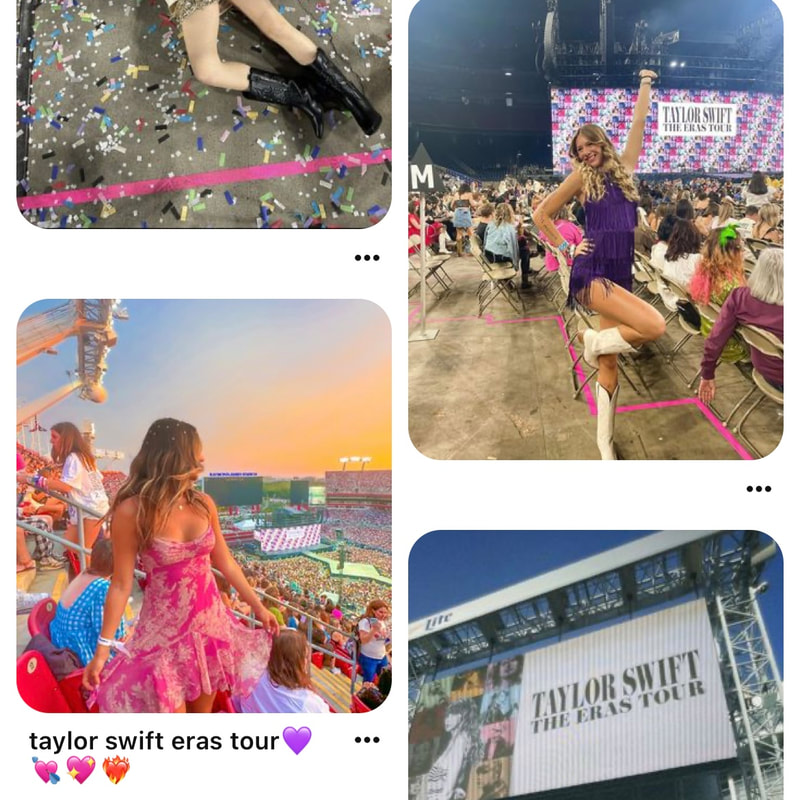 STEP 1: GET INSPIREDThere were so many directions I could’ve gone when it came to creating an outfit for the tour. I turned to Pinterest, TikTok, and Instagram for inspiration. Scrolling social media is a great way to get inspired.  STEP 2: FIND IMAGESOnce I nailed down the look I was going for (a white flowy skirt with 1989-themed pictures ironed on it), I began collecting images. My vision included a mix of images from Taylor’s 1989 album, a few of her promotional Polaroids, and some random hearts, stars, and shapes. I found most of my images on Pinterest, but also used Google Images for some generic hearts and stars. 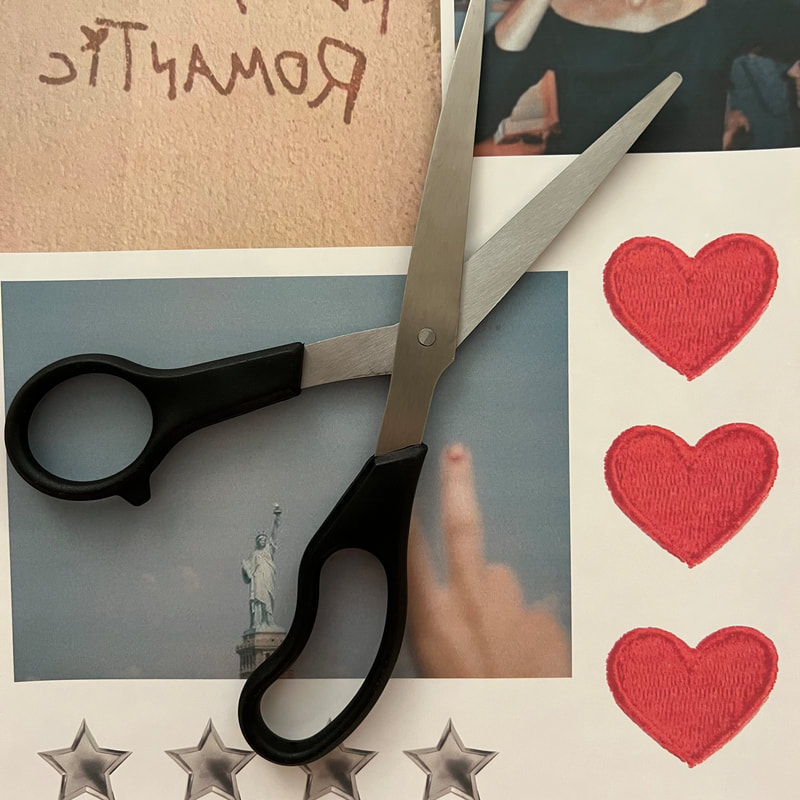 STEP 3: GATHER SUPPLIESBefore going any further, I needed to take inventory of my supplies. The products I used are listed below:
 STEP 4: SAVE IMAGES IN A WORD DOCNext I downloaded the images I wanted to use and placed them into a Word document. I arranged the images in a way to optimize space and print out as few pages as possible. Important! Before printing out the images, read the directions on your transfer paper. Some brands tell you to flip the images prior to printing. 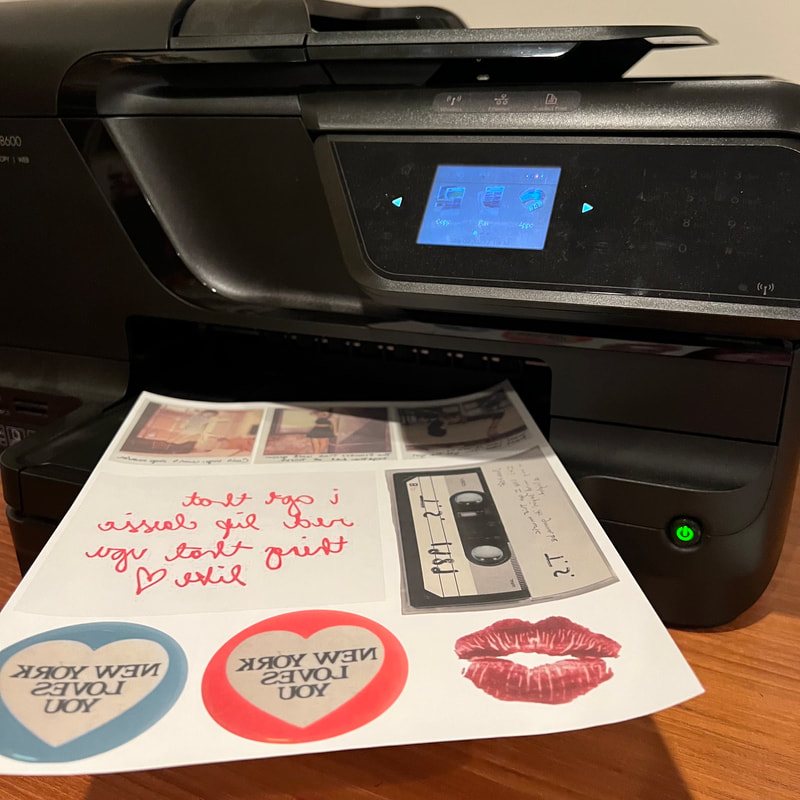 STEP 5: PRINT IMAGES ON TRANSFER PAPER & CUT OUTThis step was fairly simple. I just printed out the images onto the transfer paper, waited for the ink to dry, then cut out each image. Tip: Cutting rounded edges along the pictures makes it easier to iron them onto fabric. 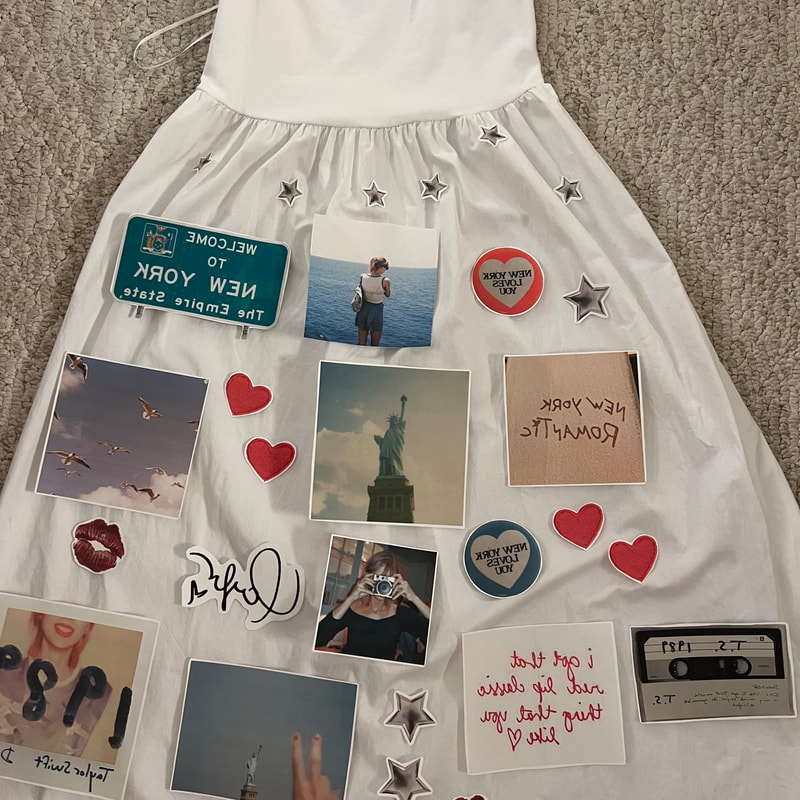 STEP 6: LAY OUT DESIGNBefore getting the iron out, I needed to come up with a specific pattern. I placed images in different spots, shifted images around, and reworked the design until I was happy with it. Important! Once you have settled on a design, be sure to take a picture of it. This picture will be a great reference when ironing down the images. 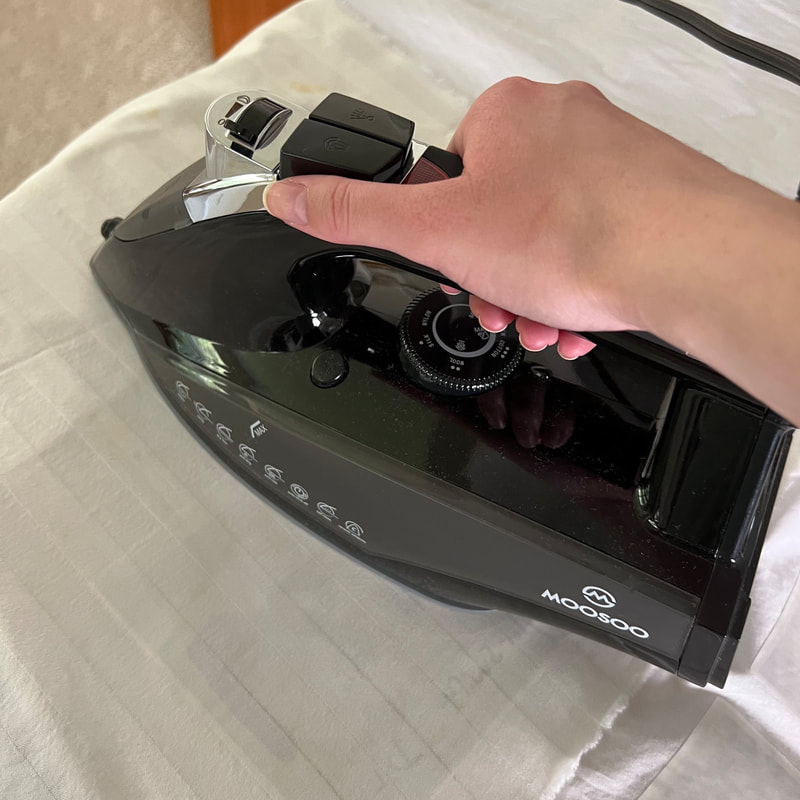 STEP 7: IRON IMAGES ONTO DRESSThis step was actually a lot more difficult than it looked! I definitely messed up, cursed, nearly cried, and actually gave up on ironing a design onto the back of the dress. The best advice I can give is take your time, follow the instructions that come with your transfer paper, place a piece of cardboard between the layers of fabric when ironing, and use an old rag or scrap of fabric as a barrier between the iron and transfer paper. 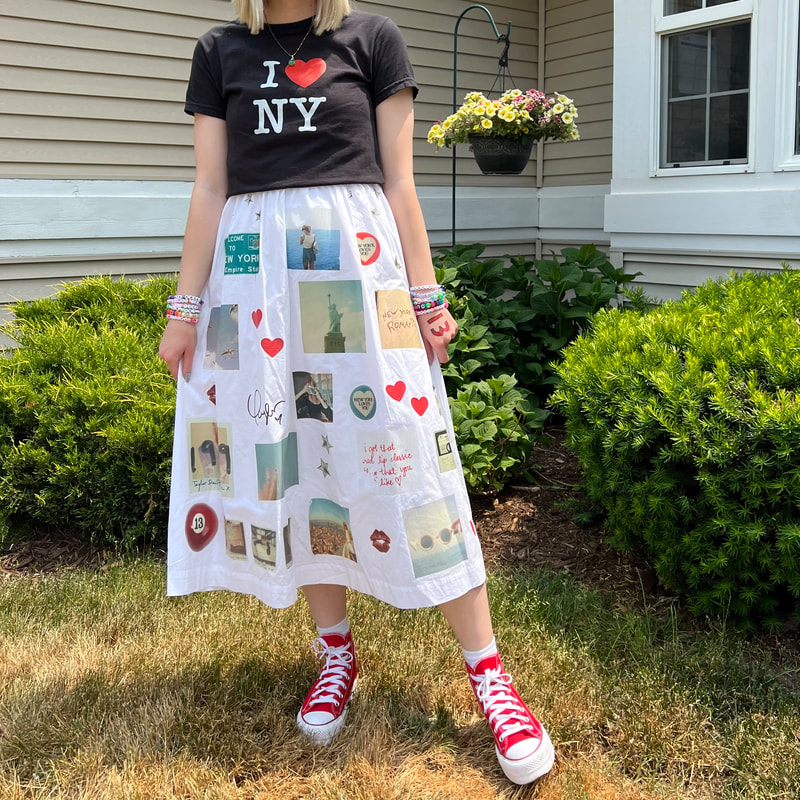 STEP 8: STYLE DRESSOnce the DIY skirt/dress is complete, it is time to style the garment. I decided to get more specific with my 1989 outfit and make it “Welcome To New York” themed. This entailed adding a black I heart NY baby tee, red Converse, and some DIY friendship bracelets to the look. Tip: Want to learn how to make your own friendship bracelets? Check out this tutorial. 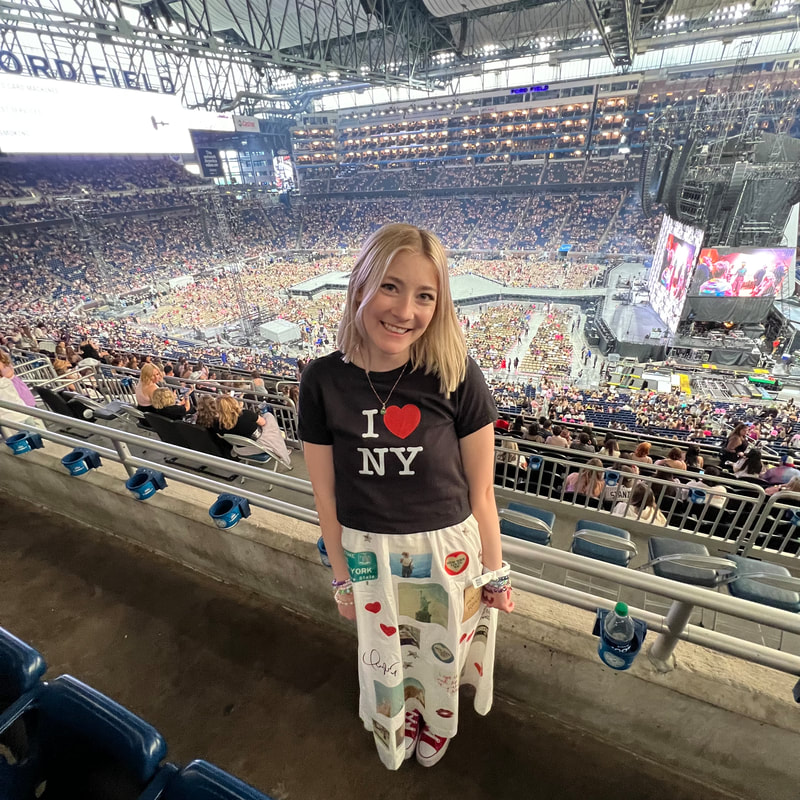 STEP 9: ATTEND THE CONCERT!Attending the Eras Tour was a dream, and I’m glad I was able to create an original, one-of-a-kind outfit for the occasion. SEE YOU NEXT SATURDAY WITH ANOTHER FASHION POST.
0 Comments
Leave a Reply. |
CategoriesAll Fashion Ootd STEFFI STYLES CategoriesAll Fashion Ootd STEFFI STYLES CategoriesAll Fashion Ootd STEFFI STYLES Authorhey it's Steffi, and this is my website where I post fashion, travel, and lifestyle blog posts. Enjoy! Archives
October 2023
Categories |
 RSS Feed